Nvidia Driver + Cuda Toolkit Installation guide
Install Nvidia Drivers in Ubuntu
Before installing Cuda you should if you have a Nvidia GPU and if it is supported by Cuda. You can check the supported GPUs here: https://developer.nvidia.com/cuda-gpus. If you do not remember which GPU you have, you can check it with the following command:
lspci | grep VGA
Then you have to install the Nvidia driver.
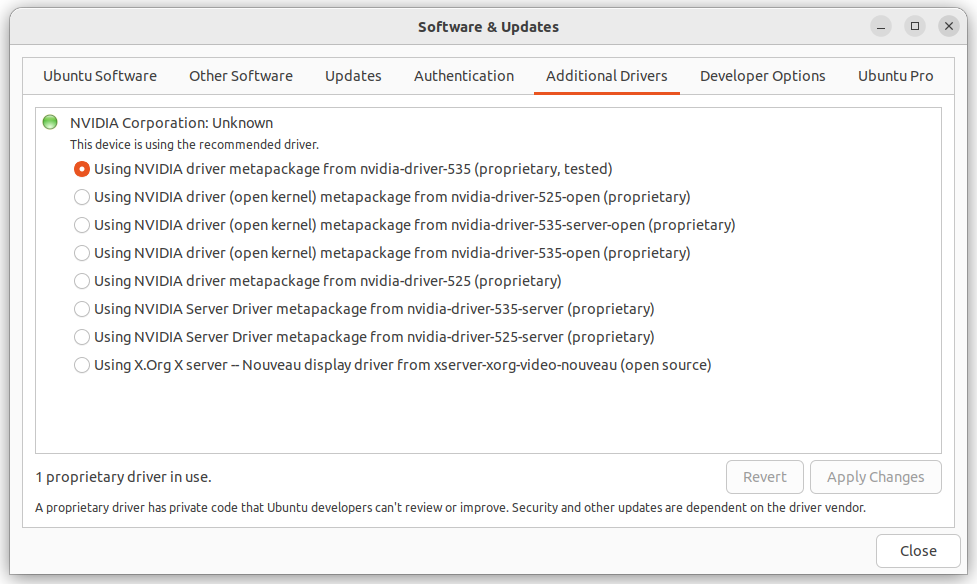
Open the application Press winkey -> Search “Additional Drivers” -> Select the newest Nvidia driver -> Apply Changes. Then reboot the system. (For some motherboard you may have to disable the secure boot).
If the driver are installed correctly you should be able to run:
nvidia-smi
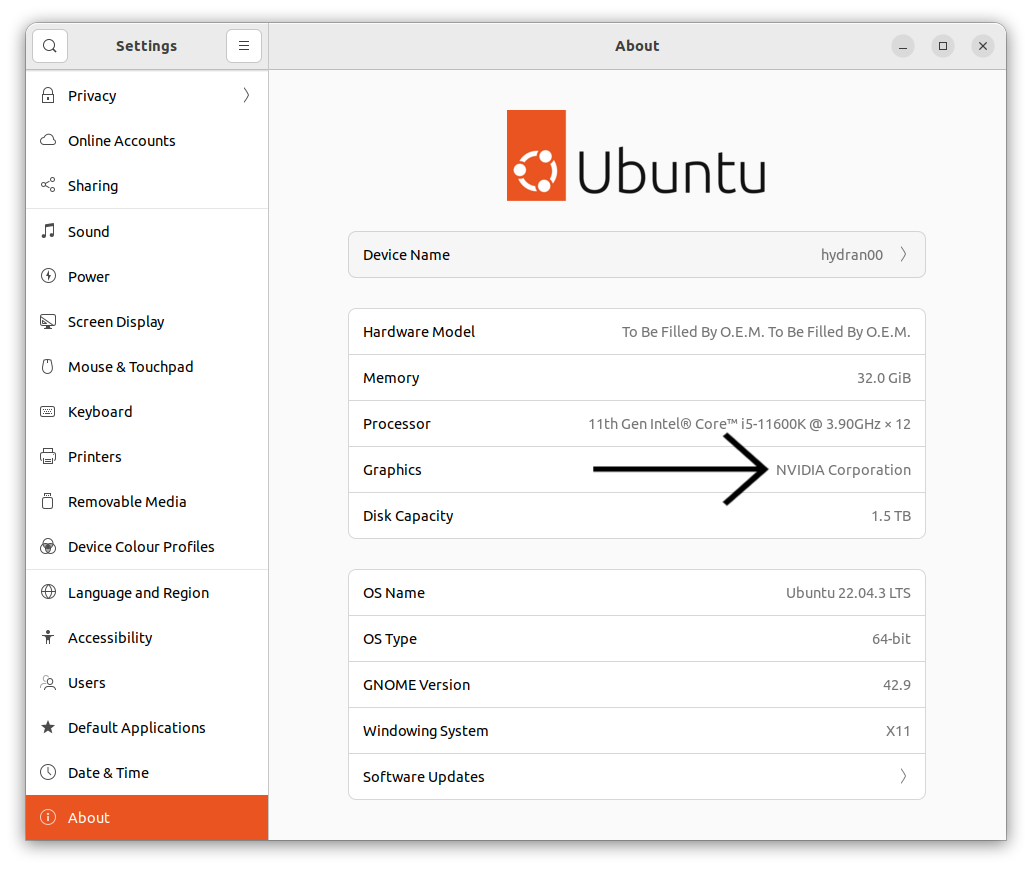
You can check if everything is ok looking into Settings -> About. You should see something like this:
Troubleshooting:
For some laptop with integrated GPU you may have to run the following command:
sudo apt install nvidia-prime
sudo prime-select nvidia
Install the Nvidia Cuda Toolkit
For this purpose you have to install the Cuda Toolkit. You can download it from here: https://developer.nvidia.com/cuda-downloads. Select Linux -> x86_64 -> Ubuntu -> 22.04 -> deb (local), then copy-paste every command one at the time.